

(Yes, you're in the right place for BOMs Away)
I hope you had a great Thanksgiving, if you're in the U.S. We had a good time - didn't take the pictures we should have done, but enjoyed the terrific snow all weekend.

I couldn't go sledding with Heather and Patrick, as my flexor's not strong enough yet to climb back up the hill. But I enjoying hanging out on the knoll with them. It's just so pretty outside when it's like this!

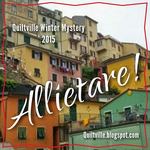
It's that time of year when Bonnie Hunter does her annual mystery quilt-along. This season it's "Allietare!", inspired by Italy. I had almost all the fabrics in my stash already, so I'm joining in again.

I did change my colors a little bit. I'm using the mustards/golds in the neutrals spot, and the teal-ish spread in place of the mustards/golds. I sewed sheets as a leader-ender for some 3D twist panels I'm constructing right now.

Lots of HSTs to make for Clue 1. I always use the paper method for a lot of HSTs. It's the fastest way out there to make a whole slew of them. This quilt-along is free until she takes it down in February or so.
 Go HERE for Bonnie's "Allietare!" mystery details and to find specifics of sizes and numbers of units. Also, she has a fantastic system for working with scraps or jellyrolls that is different from my approach and makes non-paper-piecing HST work much nicer than simple cutting and sewing. I'm linking my bit of work so far up with her current Linky, here: Allietare Part 1 Link-Up
Not much sewing time yet, as we ate our feast on Friday and had to make an airport run today. But I'll finish getting these cut out early tomorrow so I'll have something to do while I sit F O R E V E R at the DMV. It'll give other waiting folks a conversation point as I pull the papers off. :) Yeah, yeah - I know: Pretty dumb of me to leave it until the last day of the month to get the car stickers updated. It'll take no less than 2 hours, probably closer to 3.
I did not work on any "regularly scheduled" BOMs.
And I love this pic of Marissa and Navarre enjoying some cozy time nearby right now. :)

~*~*~*~
How about you? - Did you work on BOMs this past week or so?


