Quilt ADD in therapy

My photo
Colorado, United States
Other than my family, the passion of my life is quilting. An eclectic, I love a wide variety of styles and techniques encompassing both machine and hand work. I am a longarm quilter who can work for you. I enjoy any style, from pantographs to all-over to full custom, ranging from traditional to modern. I love bringing vintage tops to life and am willing to work with a challenging quilt top. Instagram: lyncc_quilts
Showing posts with label Desire to Inspire. Show all posts

Thursday, November 5, 2015

Desire to Inspire Project 8 - Those Adorable Selvages Quilt-as-you-go Hot Pad Tutorial


Quilt-as-you-go Selvage Hotpads
7.5 x 7.5 inches
fabrics: "Miss Kitty's Colors" by Marie Cole for Henry Glass plus unknown white
Insul-Bright batting

Here it is, finally - the end of my "Miss Kitty's Colors" spree! This is such a fun collection from start to finish, including the selvages. I mean, Seriously! Who can see such adorable selvages and not have to do something with them? 


These wonky quilt-as-you-go hot pads are super easy. I chain-pieced three of them from step to step, so pictures are varied as to which pad is featured during the process.


You will need:
  • background fabric for the front (I started with a 5 inch square)
  • a scrap to fit a 3.5 inch square
  • fusible material to fit a 3.5 inch square
  • selvages for the wonky play - I cut mine at 2 to 2.5 inch widths (you can use regular scraps, see below)
  • backing fabric (I started with a 9 inch square that I could trim down later)
  • thermal batting like Insul-Bright
  • some binding


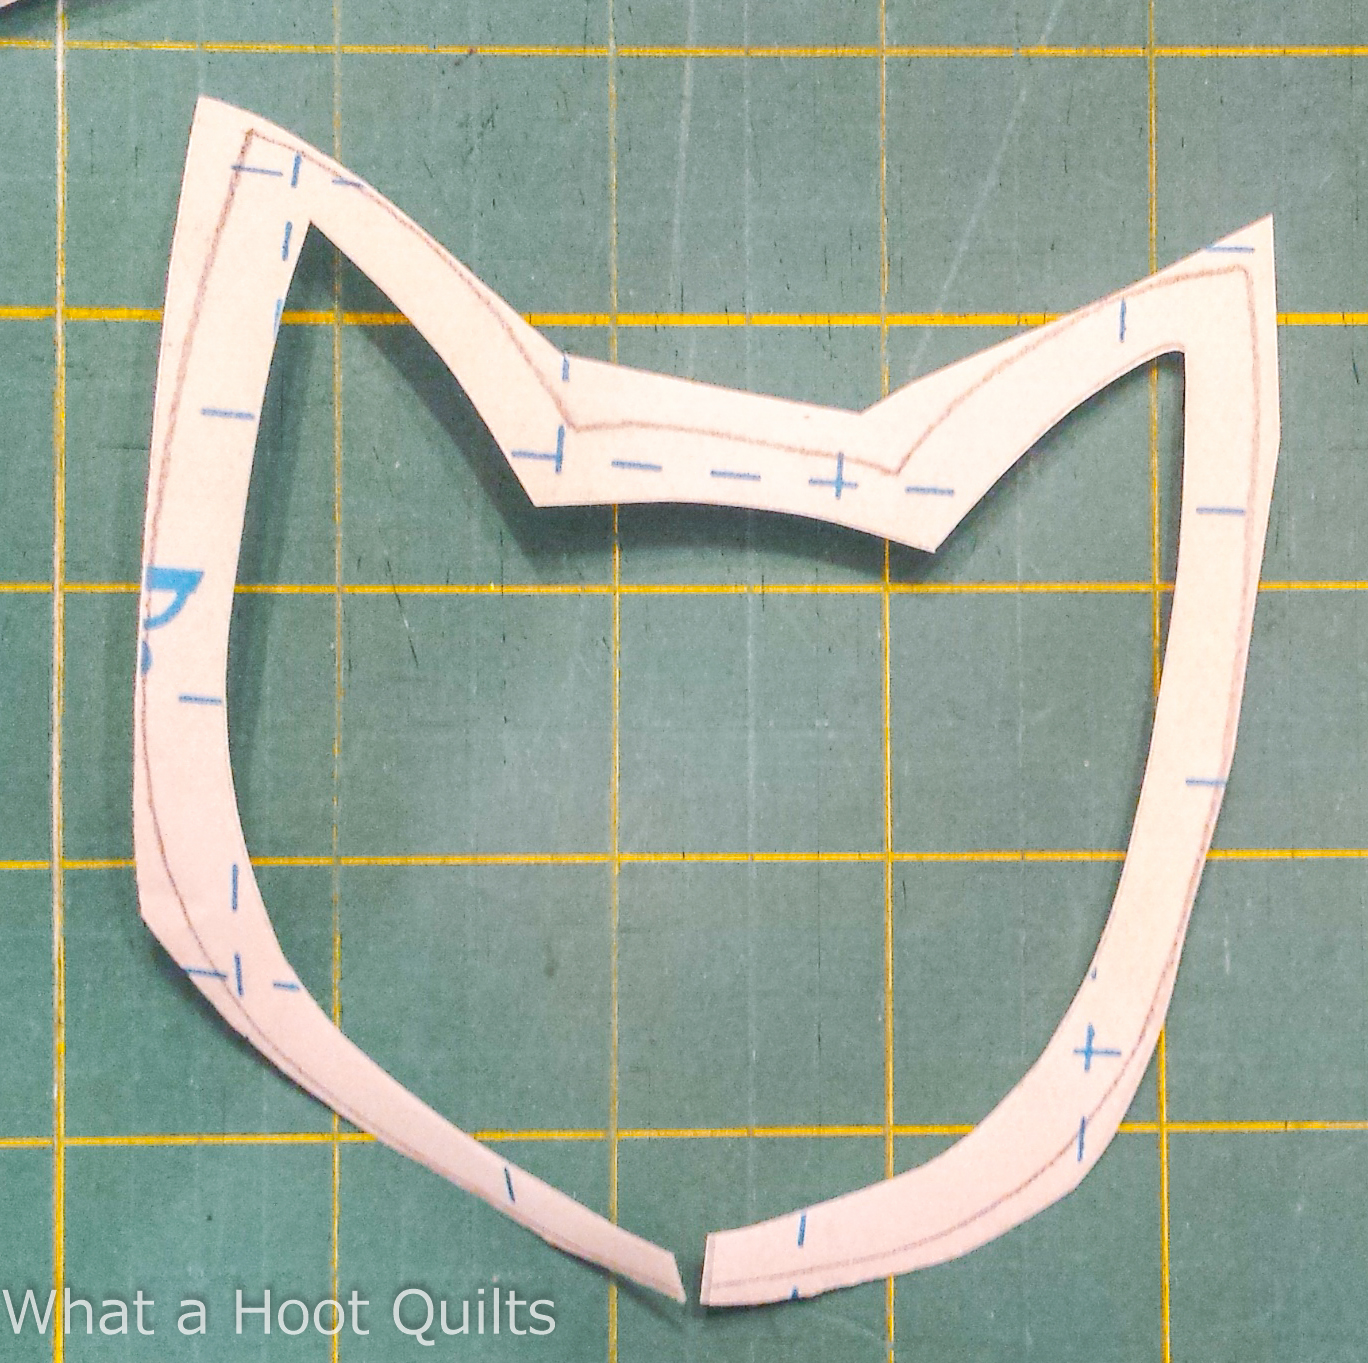
For the center kitty faces, I simply used the guttings from my Soft Kitty, Warm Kitty applique prep. Here's the image for that again. The originals were printed out as a 4 x 4 inch square, but this project's faces are at the 3.5 inch square size. Just resize the jpeg before printing it if you want the same ratio.

You can right-click to save this image to work with.


There is ZERO sewing on this hot pad before the quilting stage. In fact, the only prep work is to fuse the kitty face into the center of your background fabric.

Layer your backing, some thermal batting, and your kitty face. Pin or spray baste.


First stitch your kitty face down. Once again, I just used my machine's blanket stitch setting.

It works just fine to stitch and quilt at the same time. Just don't speed sew here, and lessen the pressure of your presser foot. See: Just fine on the back:


Now take a selvage and lay it down at whatever angle floats your boat, right side up. Top stitch this down close to the selvage edge. 


Fold the selvage onto its face so you can trim away the excess backing fabric from your seam


Layer another selvage, angled along another side, and top stitch that one down. Make sure you overshoot the end of the first one's stitching line.

Now look at the back. The first stitching line could very well shoot beyond the intersection of the second one, as I had here by about an inch. 


You'll have a much nicer hot pad if you just flick those out with your seam ripper and tuck those tails. (Pull on that bobbin thread end, and the front thread will come through, giving you an easier flick area to work in. See the holes below, where I'd unstitched that line and then knotted the threads?)


Go back to the front and fold that second piece over so you can trim away the excess fabric under it. 

Just continue these steps until you've filled all the sides. 


On one of my pads, the fourth selvage left me short of full coverage. I grabbed a normal scrap to give it one more pass. And here's where you can see the difference in construction from the selvages.


This time, lay your scrap FACE DOWN over the previous fabric, so that it will flip over onto the area you need to cover. Don't just lay it down where you want it to be. 

Stitch a 1/4 inch seam from the scrap's raw edge. 


Flip you fabric over to where it needs be, and press it down. There you go!


Almost finished. Time to square these babies up to the size you want. 7.5 inches is a handy hot pad size. It's also helpful to run a zigzag stitching around the edges to keep things from flapping around during your final step.


Now you're ready to bind these babies. 


And put a hanging loop on it if you want. 


I used a decorative trim that was on my desk, because I intend to hang mine on my mini wall. It's occurring to me now that it's not the best trim for actual use, because the heat may melt it. . .  Ah, well. Better choice to be made next time!  ;D


~*~*~

Take a look at the other projects I worked up from the "Miss Kitty's Colors" collection. If you might be interested in taking on the Henry Glass challenge, their information is included here. Don't let it intimidate you - I am just a normal private quilter, and I also had a much longer deadline than the usual 3 weeks, so I went a little crazy with my work.  :)   


This is one of my Q4 Finish Along pieces (My goal post link)

2015 FAL at On the Windy Side

~*~*~
I'll be linking up at:


Wednesday, November 4, 2015

Desire to Inspire Project 7 - "Soft Kitty, Warm Kitty" with Time-Saver Tutorial


Soft kitty, warm kitty,
Little ball of fur, 
Happy kitty, sleepy kitty,
Purr, purr, purr.

"Soft Kitty, Warm Kitty"
Study #2 in quick cat quilts
(Pictured below on the right, seen with "Kitty Shuffle")
both originals made by Lynette Caulkins
34 x 34 inches
fabrics: "Miss Kitty's Colors" by Marie Cole for Henry Glass plus unknown white and Minkee Cuddle in Platinum
Hobbs 80/20 batting
quilted on a domestic Husqvarna Sapphire 875Q

TUTORIAL FOLLOWS


I am in love with this little quilt! The name was influenced by the backing and binding made from Minkee Cuddle in Platinum, which gave it such a nice silky soft gushiness. Its size is perfect for either a wall hanging in a baby/child's room, an away-from home tummy quilt, a car quilt, or a drag-around blankie for a toddler.


~*~ "Soft Kitty, Warm Kitty" Tutorial ~*~


This is another quilt that is extremely easy to make and can be done up in a day or a weekend, and I'm going to show you a time-saver on the applique work. It's great for scraps on hand or charm squares.

Again, this is a free "pattern" that you may use for personal quilts or gifts, and can change up any way you like. There's a link below to share your rendition if you use it. :)

It is sized here to fit on a one yard purchase of Minkee if you are quilting it at a domestic machine. (You'll need a yard and a third for longarming.)


FABRICS

From your scraps or charms:

You will need 9 pieces that can fit a 4 inch square 

Inner Frame fabric: 
   Cut 2 strips that are 1" x 19.5 inch
   Cut 2 strips that are 1" x 20.5 inch

Fusible applique material:

Trace 9 of these patterns (see comments in the construction notes below). I think you can just right-click to save this image so you can check the size (or change it to fit your desires). It should be a 4x4 inch square size, and you can print one that you can trace.


From your background fabric: (I used 1 yard of white)

Center square: 19.5 inch square

Border strips: 
   Cut 2 that are 7.25" x 20.5" 
   Cut 2 that are 7.25" x 34"


CONSTRUCTION

Applique prep:  We're going to kill two birds with one stone during the quilting, so we'll only prep the applique during the construction process. Also, I'm going to show you how to reduce a lot of stiffness in your fusible applique work.

You need nine kitty faces traced onto fusible material. I use Steam-a-Seam Lite 2, but you can use any of the brands out there. (Pay no attention to the yarn balls I'd traced inside the faces - I was going to put some around the outer portion of the quilt, but didn't like the effect.)


Cut the faces apart (but don't cut on the traced lines yet).

Now for the first half of the secret to keeping your fusible applique quilts from getting stiff: You need to "gut" your fusible pieces. Just cut right across the line into the center and cut away the inside part, leaving an eye-balled 1/4" allowance inside the shape's line.


Lightly iron the fusible to the wrong side of your kitty face pieces, lining the cut-apart portion up with itself nicely.


A quick multi-press job will do just fine. Don't spend time doing each one separately.  :)  This is just to hold the fusible securely enough to cut out the shapes. 5 or 6 seconds does the trick.


While those are cooling off, give yourself some guidelines on the middle square of background fabric. First I folded it in half each way and lightly pressed. Then I used my long ruler and a water-erasable marker to make light lines on either sides of those press lines going in each direction: 
   2 inches away from the line
   1.75 inches out from those
   4 inches out from those
   
This gives you a nice grid to make sure your faces are evenly spaced. Here you can just barely see my lines:


Go back to your faces and now cut them out along the tracing lines. Peel the backing paper off the fusible, position the faces into the grid so that they make you happy, and mist-spray the blue marker away. (I like the Steam-a-Seam because it sticks to the fabric enough to let that keep these in place at this point, but if yours doesn't do that, you can pin them down enough that they won't move when you take this to the ironing board.)


Go eat eat lunch while you let this air dry. When you come back, you can make certain you don't need to spritz any blue lines again, and then fuse the applique pieces down permanently according to the material's directions.   

Let it cool a bit, then use the second half of the secret to keeping fusible applique quilts from being stiff: Carefully cut away the backing from the middles of the kitty heads. I pinch the backing fabric away from the kitty face, make a teeny snip, then carefully cut the fabric away close to the inside edge of the fused stuff. (It's much easier to do this with small, sharp scissors.) Just don't do this while you're distracted - it needs your full attention. 

(hmm- I don't have a process picture of that for this project, but this is what I'm talking about on another project, where the blue backing has been cut away from the inside of those cream ribbon pieces):

Back to our Kitties - Forget about stitching the faces down. It's not necessary!! Let's do something better with that time!  :D

Sew on the Borders:

First sew the inner framing border on. Attach the shorter strips to the sides of your center, sewing with the thin strips on top, and press the seam toward the border strip.  Then do the same for the top and bottom.


This is a skinny frame - just 1/2 inch finished, so when you add the outer background pieces to the sides, sew it with the strips on top again. Otherwise, the previous seam messes with your feed-dogs and makes your stitching line wobble. 

Press these seams into the frame, also. The dimension created is nice and logical, and gives you the base needed for stitch-in-the-ditch work during the quilting.

Add the top and bottom as well, and you have a very fast quilt top ready to go. Although, now is a great time to mark your quilting plan if you want. I used a wavy ruler I have to create the quilted framing lines, then just marked in an on-point grid to fill up the outer background.


Two-In-One Quilting and Applique Stitching:

You are going to stitch the edge of the kitty faces down as part of the quilting process, so layer and baste your quilt as you like. If you spray baste, I would recommend adding pins around the faces for added security during that stitching. And if you layer it up with Minkee backing, you'll want your pins closer than normal.


I used my machine's blanket stitch to finish my kitty faces, so I put on my walking foot. You can use a different fancy stitch on your machine, or instead free-motion 2 or 3 straight-stitch rounds on them. It's all up to your preference.  (You'll get a nicer quilting result if you significantly lower the pressure of the presser foot - on my machine, and with Minkee backing, I changed mine from the factory-set 6.0 to 3.0.)

My machine does this electronically. Some machines have a turn-dial, and others have a spring-loaded peg to push in. Maybe do a Google search on your machine if you can't find it. (Some machines cannot do it.)
If you have not blanket-stitched applique pieces before, you can search online for some great tutorials on how to do it nicely. There is a little bit of an art to getting it lined up nicely and making curves and corners look good. But don't be afraid of it - it's not hard!

Once that was done, I used thread that matched my background to quilt the rest. First I stitched in the seamlines on either side of the framing border. Then I quilted the double wavy frame lines. The on-point grid was rather fun to follow around (I carefully stitched on top of the pre-quilted wavy frame lines to travel to the next grid line - I didn't stop-and-start all those).  I then decided the center needed more quilting, so I put on my free-motion foot and echoed those at about 1/2 inch width. (Once again, I'm missing some process photos - sorry about that!)

Voila! Bind your quilt, and isn't that adorable? (I used a single layer of minkee this time)


Navarre sure thinks so. He's a happy, sleepy kitty, too - look at that yawn.  :)


And the Minkee back makes the quilting look so nice!


If you make a "Soft Kitty, Warm Kitty," go ahead and link it up here. This will remain open indefinitely.


~*~*~

Take a look at the other projects I worked up from the "Miss Kitty's Colors" collection. If you might be interested in taking on the Henry Glass challenge, their information is included here. Don't let it intimidate you - I am just a normal private quilter, and I also had a much longer deadline than the usual 3 weeks, so I went a little crazy with my work.  :)   


This is one of my Q4 Finish Along pieces (My goal post link)

2015 FAL at On the Windy Side


~*~*~
I'll be linking up at:


Tuesday, November 3, 2015

Desire to Inspire Project 6 - "Kitty Shuffle" with Tutorial


"Kitty Shuffle"
Study #1 in quick cat quilts
(Pictured below on the left, seen with "Soft Kitty, Warm Kitty")
both originals made by Lynette Caulkins
48 x 51 inches
fabrics: "Miss Kitty's Colors" by Marie Cole for Henry Glass plus unknown white background
Hobbs poly batting
quilted on a domestic Husqvarna Sapphire 875Q

TUTORIAL FOLLOWS


Now, I say this is an original design, because I sat looking at the scraps I had left of "Miss Kitty's Colors" and came up with two of my own ideas. In the last week, I've seen three different kitty head quilts very similar to this, so it's not "original" in the sense of being unique. 

My desire was to have simplified quilts that could be finished easily in a weekend. This design makes a quick, cute, crisp-looking gift that takes advantage of a person's scraps on hand. It's also perfect for pre-cuts such as a layer cake or a fat eighth set. 

I adore the crispness of a white or very light background. It's fantastic to pair with a great color for the back, too. Here I used a pretty yellow from my stash, which wasn't quite big enough on its own.


I had just enough length of yellow to back the quilt from top to bottom. But the quilt is wider than uncut fabric. As you can see, I simply sewed a couple columns of scraps together to insert so that the fabric would be wide enough. Super cute! And that let me include some of the super cute block feature print that I didn't care for on a kitty face.


That yellow was perfect for the binding as well, which was machine sewn - that approach fits this style of quilt very well, and I like to use it on children's quilts. I attached it to the back, then wrapped it around to the front and sewed it down with a very fine topstitch line.


"Kitty Shuffle" looks great just as it is, or the faces could be embellished with whiskers, eyes, and any other features wanted.


~*~ "Kitty Shuffle" Tutorial ~*~


This quilt is extremely easy to make. You will need 25 kitty heads, some spacers and rows of background, and that's all. You may use this free quilt pattern for personal quilts and gifts, and may change it up any way you like. If you do use it, I'd love to see what you made linked up below.

You can also redo the sizing if you want it smaller for a baby, or add more blocks for a twin size bed cover. This is a great sofa size for a child. For an adult I would probably go to 6x6 grid for a quilt that's 57 x 61 inches, or a 7x7 grid for a quilt that's 66 x 70 inches. (If you're using this tutorial's dimensions, add or subtract 9 inches to the width per head, and 9-3/4 inches to the length.) 

CUTTING

From your scraps or pre-cuts:

25 face parts: 6.5 in. wide by 5.25 in. tall (pay attention to the orientation of directional prints)

50 coordinated ear pieces: 2.5 in. squares  (cut two of these for each one of the faces using the same fabric)


From your background fabric: (I used 1.75 yds. of white)

25 head pieces: 2.5 in. by 6.5 in.

30 spacers: 3.5 in. by 7.25 in.

6 background rows: 3.5 in. by 48.5 in.


CONSTRUCTION


First make your heads:  

These will finish at 6 x 6.75 inches

Sew the ears to the head piece of background. I did zero marking on this project. The ears can be as wonky or straight as you please. (If you'd like to go wonky, you may like cutting your squares larger so you have room to play with angles, and then trim after things are pressed open.)

 I wasn't going for wonky, but I wasn't about to fret over preciseness. I simply laid a square right-sides-together on one end of a background piece and eyeballed the diagonal as I sewed from one corner to another. 


Then you lay the second square of that fabric on the other end and sew a diagonal, making sure it's direction is opposite from the other squares - you do not want to make a parallelogram.  You need this trapezoid shape in the end:


Also make sure you keep directionals and strips oriented the right way to your seam. I folded mine back as I went, so I could make sure the stripes would run the same as each other AND horizontal, as they do in the face pieces. Stripes can be tricky, so double check before you stitch.


I like to reap freebie half-square triangle units when doing this kind of piecing. To do so, just run a second line of stitching about 1/2 inch further toward the cut-off corner. You'll be cutting the extra corner off between those lines.


Press as you like. I knew I would quilt through all horizontal seams, so I did NOT press mine open. (Also, I don't like the seam allowance showing through white fabric on a quilt top.) I pressed the seams toward the cat heads. Nothing is small enough to create troublesome bulk. If you're going to use a different quilting approach or have a desire for perfectly flat flocks, press your seams open. It's all personal preference.  :)


Now do the "Shuffle" part and find a layout that pleases you:

This is a great task to let your kids help with. Or your cats.


 Lay the heads in a 5x5 grid and shuffle them around to find a good balance of color and contrast. Leave it there and see what you feel about it a couple hours later. Take pictures so you can go back to previous layouts if you want. Step back and squint - are there areas that just go blah with too many darker or lighter or same-color blocks?  


Add your spacers:

Once you have the layout you like, work in rows to sew your vertical spacers in. You will need 6 spacers for each row of 5 heads. 


Sew all your rows together:

Now you're ready to finish your top! You will have 6 background rows alternating with your 5 kitty rows. It's a good idea to backstitch the beginning and end of each of these seams.


*QUILTING*

This design is perfect for the modern straight-line approach. I pin-baste my quilt sandwiches, so I placed my pins in horizontal rows between the long seams so I wouldn't have to move them before several lines were already quilted in. That way there was no stopping while sewing! 

I used my walking foot with the presser foot tension lowered from 6.0 to 3.5, lengthened the stitches from 2.0 to 3.0, and set my machine to needle-down mode (so when I lift off the foot pedal, the machine stops working with the needle in the all-the-way-down position to keep from losing the exact spot when I start going again). 

Then I went to town with unmarked work.


I first sewed right on the long seam lines where the background was joined to the kitties and and also where the ears were joined to the faces. Then I divided and subdivided the sections that were created by eyeballing divisions that would get me about 5/8 inch widths between the first quilting lines. I did not fret about exactness. It came out GREAT as a whole. I used 50 weight thread that matched the background. 

While this is a very fast quilting solution, you don't want to put the pedal to the metal and race as fast as your machine goes. Even with a walking foot, that will contribute to those yucky pulling wrinkles we get on our quilts if the layers slip a bit. (This is also why I lowered the presser foot tension.)

This design would do very well with any number of all-over free motion motifs. Or you could get fancy and quilt in whiskers, eyes, nose-and-mouth, and do some echoing. 

In any case, it's absolutely cat-approved. Navarre has loved it every step of the way, 


and even the elusive Clara had to come and enjoy it.


If you make a "Kitty Shuffle," go ahead and link it up here. This will remain open indefinitely.

~*~*~

Take a look at the other projects I worked up from the "Miss Kitty's Colors" collection. If you might be interested in taking on the Henry Glass challenge, their information is included here. Don't let it intimidate you - I am just a normal private quilter, and I also had a much longer deadline than the usual 3 weeks, so I went a little crazy with my work.  :)   


This is one of my Q4 Finish Along pieces (My goal post link)

2015 FAL at On the Windy Side


~*~*~
I'll be linking up at:


Sew and Sow Farm